 Some
folks seemed chilly during wintertime PizzAmore so I decided to build a
small heater in the bottle house
Some
folks seemed chilly during wintertime PizzAmore so I decided to build a
small heater in the bottle house This
is the feed door side
This
is the feed door side
A view of the top surface. An antique cast iron surface in the corner will allow for a pot of hot water or stew. Heavy slate slab will retain heat and give it off gently

Cutting and fitting the decorative outer slate walls.

The star pattern for the north wall of the heater.

Finished - it's going to work as intended!

Another view of the heater when finished. I fired it with 3 small sticks of wood for an hour. 5 hours later the outside temperature was still above 100 degrees. Just what I imagined it would do.

Monica signs her license plate

Kansas corner

2 of the Kansas bottles will be bell hangers outside the north wall

Well, plans change fast around here so the east wall has been taken down and replaced with a wood-fired pizza oven called PizzAmore
 The
north wall on September 1st, 2007. The evergreen tree in the wall is
becoming more evident now, as the wall is nearly half done at this point
The
north wall on September 1st, 2007. The evergreen tree in the wall is
becoming more evident now, as the wall is nearly half done at this point
Carol Page sent this lovely selection from Kansas to be included in this wall. I think they'll all go up in the upper right corner. The blues will become a 'blue moon'. We'll designate that area of the Garden Gate as Kansas Corner (I'd make it Karol's Kozy Kansas Korner, but that's just too Korny)

The west wall in late afternoon, as viewed from inside the Teahouse

North wall complete

I moved the newer images to the top of the page. You can still wander to the rest of the images to see how the project went.

These 2 images show the west wall completed. It's sort of buried up in sunflowers that came up from the soil we put in the new garden spot this spring

The north wall on August 22nd, 2007

North and west walls on August 22nd, 2007
Day 1
The pad for the little house is 10'x12' - this should give us room for a cup of tea now and then.

Green lumber weighed less than this 30 years ago when we began the house project. Now the real work begins as I start to cut and fit the basic structure.

Having the forklift tines on the tractor makes the work easier. The workbench is always at the right height

The tenons are shown cut and nearly ready to accept the header

A closer look at a tenon before final shaping to fit the mortise

Here the header is shown ready for the assembly into a bent

The first bent is assembled and shows the small knees as corner bracing

The 1st bent is ready to stand up. First I'll complete the 2nd one

When we built the house the structure was somewhat larger and it was lifted into place by human power ( the local fire department guys). What a treat to have equipment. The first part of the house itself was basically built with a chainsaw and an axe. It's a wonder it hasn't fallen down around us

Another view of the big lift

Here you can see the 2nd bent standing in place waiting for the cross headers to go on

Here is a great view showing the frame with some of the knees in place. More to come as the cross headers go up and the roof structure evolves. My thanks to Chris Gee for her generous offer of the knees to use for this project. Newm will always be there when we have tea by the garden.

Corner with knee detail

view from the west

Another view from the west - not bad for one day's effort
Day 2
The 1st rafter was a little tricky putting up without me falling off the back side of the thing

There will only be 6 rafters but they're fairly hefty so I don't think the roof will cave in any time soon
Day 3
The last rafter is lifted into place

A pained look as I try to get it into the right spot without it (or me) falling on the ground

Attaching it feels great as the rain begins

I don't think I'll be applying for any skyscraper-builder jobs any time soon

Just in time, as the skies open and the rain falls-October 28th-weather man says nearly 5 inches fell after I finished
Day 4
It sprinkled a little as I began to stain the framework. by the time it was about done I was working in quite a snow flurry, but the frame is now ready for the roof boards. Maybe tomorrow if it's nice out I can begin that process. Then the cedar shingles will have to be stained and applied. There are a few more days of work yet before it stops for winter.
Day 5
October 31, 2006. Sunrise reflects on the roof while it awaits shingles

A third of the way up the first side of the roof

OSHA approved scaffolding makes the job easy and safe?

Had some interruptions, so lunchtime finds me (well, the shingles) 2/3 of the way up the roof. The other side will present different issues with scaffolding, since the tractor won't fit in on that side without driving over the gardens-not a good idea at all

The sunshine promised by the weatherman never materialized. It began to rain steadily just as I ran out of shingles that were stained. I spent the last hour and a half dipping the remainder of them so I'll be ready to start again first thing in the morning. Lots of figuring as I near the peak so I doubt I'll finish before Thursday or Friday
Day 6 
The west side of the roof is done by 8AM. On to the east side now

The sun came out for nearly the first time since I began this project. It's shorts time again! Yippee!

Lots of climbing up and down has worn me out today. That and the gorgeous sunshiny day and multiple interruptions with phone calls. With any luck one more day on the roof should finish it up and put this project to bed for the winter. Unless of course we have great weather in early November and I just keep going. We'll see soon.
Day 7
Frosty morning will make me wait to climb on the roof today

Pink sky in the east suggested a pretty day but it was off and on sun and cooled off fast after 3PM

The roof was finished by about 1PM. As I drove the final nail it began to snow

The goal was to finish the roof by next Saturday (November 11, 2006), but it must have been too low a benchmark so I changed it to having the gable ends shingled by next Thursday. Assuming fair weather I'll actually finish it tomorrow. This shows the boards on the north gable end

This shows a little of what it will look like when done - at least the gable ends. The walls are to be a different material. That will have to wait for warm weather though.
Day 8
Migrant worker, Maria Conchita Alonzo Graziella Esposa lends a hand

Nearly there on the first end

Viola!

Detail of peak

After lunch we set up actual scaffolding (what a concept!) and began the other gable end

Mr Safety strikes again

My knee wanted some publicity along with the really nice knees in the building. Look closely for it. Cold and wind made us quit for today. Tomorrow should see this part completed
Day 9
I've now graded up the grass by what will be the entry from the driveway. Then I moved some landscape timbers around to enclose the triangle that was created by putting a structure where there was none before. The hard part is always digging out the sod. Then I added in some nice heavy flat rocks as stepping stones in what Marian will make into another flower garden in the spring

The weather warmed and even in the rain I find that work can continue for a while yet. Here we see the wall-building materials laid out in the pattern that will become the south wall

Bottles of all shapes, colors and sizes will be cemented in to make the walls. I suspect the deer could get through if they tried but I don't think it will occur to them

Every few rows I'll put in some wire to hold things together, just for insurance. I have enough materials to go about 2/3 of the way up the first side of the building. We'll be collecting glass bottles through the winter so I can begin laying up more when spring arrives. Hopefully the winter will be kind so it holds up until I can finish it and the roof give it some protection.

In this image you can begin to see the trunk of the stylized spruce tree that will be the center of this wall. I'm doing this one as the practice wall because it's least likely to be seen by anyone unless they happen to be wallowing through the vegetable garden

A longer view of the same stage of development. We'll need to drink more white wine as I'm nearly out of clear bottles already. This wall will use about 800-1000 bottles. It's the smallest of the four walls so we'll use somewhere around 5000-6000 for the entire project. Hic...
Beginning to show the pattern now

The hard part-mixing and cementing round, slippery stuff together

Checking the depth of the mortar line

Here you can see the stylized evergreen tree beginning to emerge-some imagination is required of the viewer. The first of several odd-shaped windows has now been installed

This is what we'll be seeing from November 2006 until the spring thaw when I can begin again. There's too much danger of a freeze overnight now for me to continue doing mortar work. By spring maybe we'll have bottles enough to finish this wall and start another. I suspect the garden shed (in the background and in need of shingles itself) will be full of materials by spring melt.

The first winter snow in 2006 looks cozy around the teahouse

This is the inside wall, wrapped in fluffy snow
January 15th, 2007 finally brings measurable snow to our yard - imagine a picture of a snowy yard...
The first wall is nearly done on April 21st, 2007
Sure it's messy - it's still under construction

The South wall is done now-view from the garden

Warm weather and the end of May finds the west wall about 5 rows high. Materials are in scant supply-at least the clear ones...

In this view you can see the start of the east wall, comprised of all clear and fairly short bottles so the wine bottle necks don't protrude into the room and get broken off by a passing wheelbarrow

Another view of the east wall a week or so later than the last one

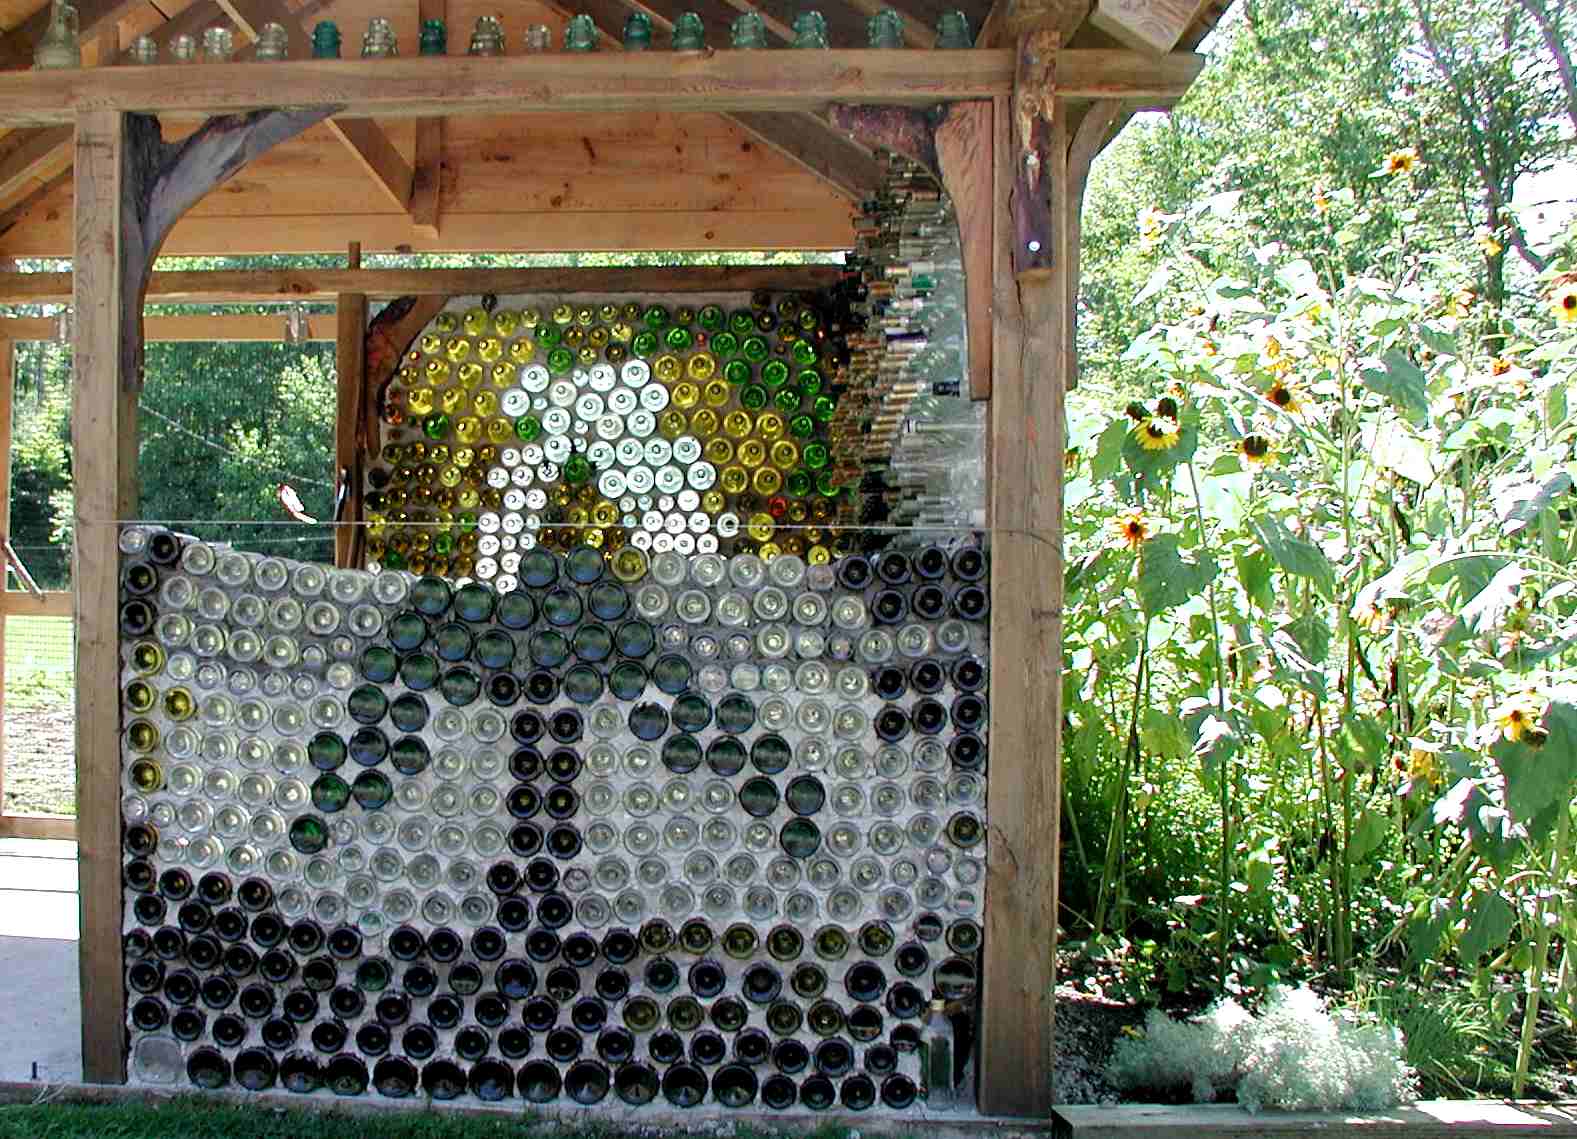
West wall on June 24th 2007

West wall and guardians on July 1st 2007

West wall viewed from the east on July 1st

Here we can easily see the evergreen developing in the west wall with the light shining from behind it on July 1st 2007

Another view on July 1st
The east wall ended up getting taken down to accommodate the new wood-fired PizzAmore